
Exporting video from tiles in the Genetec Web App
2026-05-14Last updated
To play video files outside of the Genetec Web App, you must export the video from a tile to your local hard drive.
Before you begin
Important:
Turn off your web browser's pop-up blocker to
allow video exports from the Genetec Web App to your local hard drive.
What you should know
- Videos are exported to the download location set in your web browser. The default location is C:\Users\<username>\Downloads.
- You can export video in the following formats:
- G64
- G64x
- MP4 (default format)
- ASF
- To export videos, you need the Single user video export privilege, or authorization from a user with the Export video privilege.
Procedure
-
Click Browse (
 ) to display your entities.
-
Click Show more (
 ) > Export (
 ).
The Export video dialog box opens.
).
The Export video dialog box opens.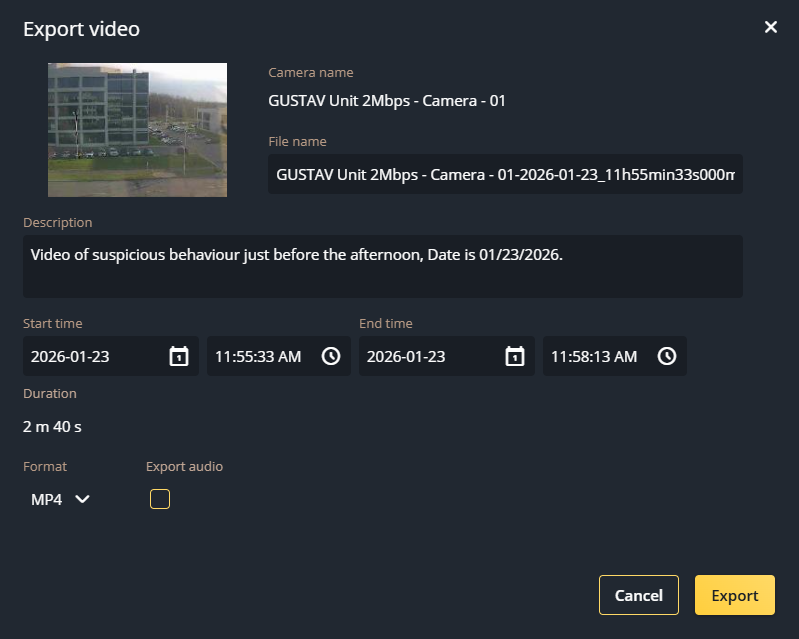
-
Click Export.
The video is exported to your local hard drive.Tip:On the task bar, click the download button (
 ) or the pop-up notification on the task bar to start, stop, review, or
clear your downloads.
) or the pop-up notification on the task bar to start, stop, review, or
clear your downloads.
Example
Watch this video to learn more. Click the Captions icon (CC) to turn on video captions in one of the available languages.